90 Degree Angle – Measurement, Definition With Examples
reviewed by Janice S. Armas
Updated on April 5, 2026
In the world of math, the 90° angle is one of the most absolutely essential concepts. Also known as the right angle, it stands for the perfect square corner you see at the intersection of two streets or where the walls meet the floor.
In this article, you will learn about the 90 degrees angle in detail, including its definition, how to measure it, how to construct one using different tools, and much more.
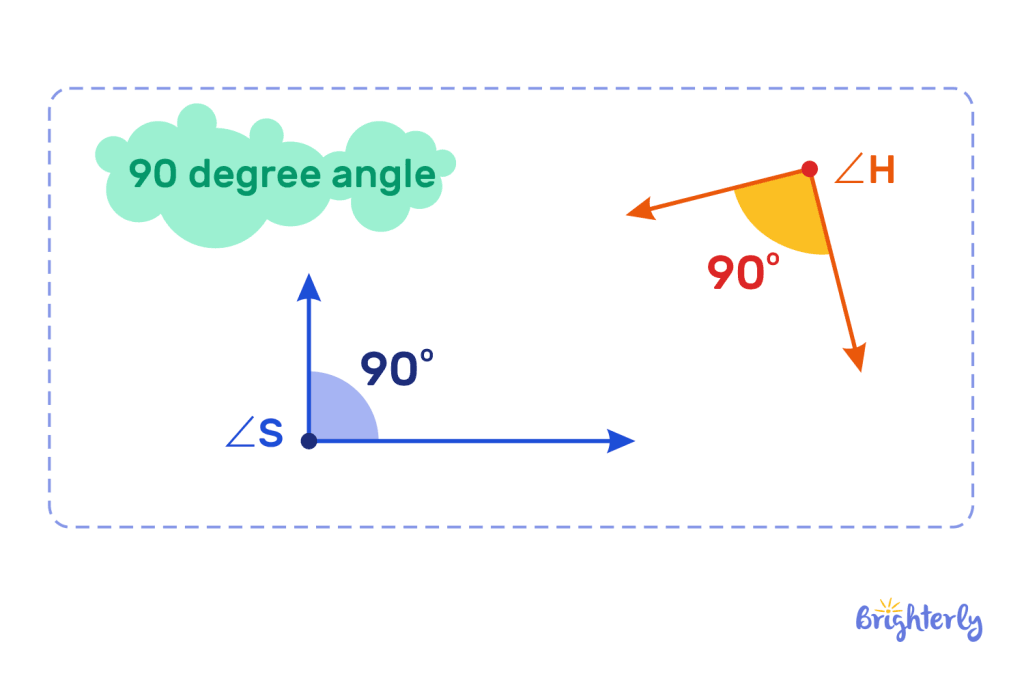
What Is A 90 Degree Angle?
A 90 degree angle is an angle that measures 90 degrees. You’ve probably already come across it in math via squares, rectangles, and right-angled triangles. Also, please notice that a 90 degree angle makes a corner shape, and it is formed when two lines intersect perpendicularly. Some people wonder if there is a 90 degree angle formula, but there isn’t one.
Expert Math Tutors for Every Level
Connect with professional and certified educators who provide specialized support for every grade level, from elementary school basics to advanced algebra
90 Degree Angle Definition
So, what is a 90 degrees angle? The 90 degree angle definition states that it’s an angle that features two perpendicular lines that intersect to form exactly 90 degrees in measurement. You’ll notice that, as well as forming a corner, it forms an L shape, which is why it can be represented by the ∟ symbol.
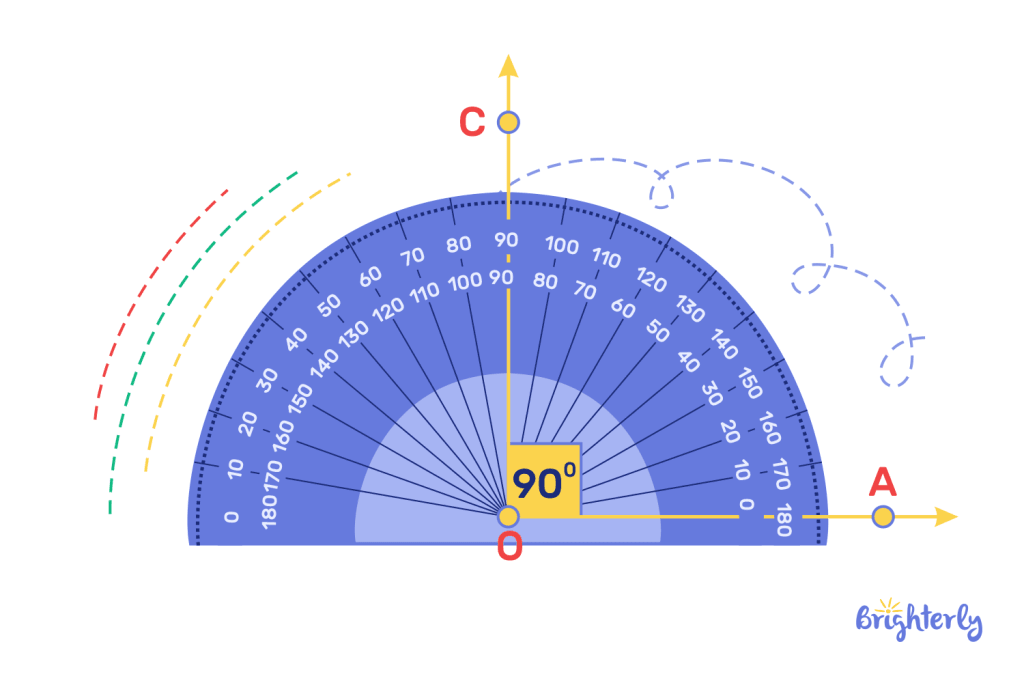
Measurement Of A 90 Degree Angle
If you’re looking to measure a 90° angle, you’ll get the best results using a tool called a protractor. This semicircle-shaped tool measures angles up to 180 degrees wide.
To use the protractor, simply align the protractor’s base (the straight edge) with one of your lines, then note which number the other line hits. This is the degree of your angle. In the case of the 90 degree angle, it will exactly match the middle of the protractor.
90 Degree Angle In Geometry
The angle of 90 degrees is commonly found in geometry. It forms many common shapes we recognize, including rectangles and squares. It can also be found in some other polygons and one specific type of triangle – the right-angled triangle. If you use a graph, the horizontal and vertical axes of the graph will form a 90 degree angle. It also relates to the Pythagorean theorem.
Difference Between 90 Degree Angle And Other Angles
Primarily, the difference between the 90° angle and other angles is that they have different measurements. But there’s more to it than that. All angles that are:
- smaller than 90 degrees are called acute angles
- larger than the right angle but smaller than a 180 degree angle are called obtuse angles.
The 180 degree angle is known as a straight angle, and any angles larger than this are known as reflex angles.
Examples Of 90 Degree Angle In Everyday Life
If you are looking to see what does a 90° angle look like in real life, there are plenty of examples out there. In fact, it would be very hard for your child to look around them and not spot at least one right angle at any given moment. Some of the more common examples include:
- The corners of a book
- The corners of a table
- The corners of your house
- The corners of TVs and computers
- Street intersections


Help your child reach their full potential!
Answer a few quick questions about your child’s learning, and we’ll recommend next steps.
Creating A 90 Degree Angle: Step-By-Step Procedure
To create a 90 degrees angle, it’s easiest to use a tool called a compass. Here’s a step-by-step guide to drawing a 90 degree angle:
- Draw a straight line
- Place your compass point on one end of your line and draw an arc above your line
- Place your compass point on the other end and repeat, making sure the arcs intersect
- Draw a straight line from the intersection to your original line
Drawing A 90 Degree Angle Using A Protractor
You can also draw a 90 degree angle using a protractor. Here’s how to do it, step by step:
- Draw a straight line
- Place your protractor base on your straight line, identify 90 degrees on your protractor, and mark it
- Remove your protractor, and draw a straight line connecting to your original line
Constructing 90 Degree Angle Using A Compass
Another way you can construct a perfect 90° angle is through a compass. This method relies on creating a perpendicular bisector to make sure that the corner is mathematically exact. To do these, your kid needs to follow these five simple steps:
- Draw a straight horizontal line and mark P in the middle where they want the angle to be
- Place the compass point on P and draw two small arcs on the line, one to the left and one to the right. Mark these points A and B.
- Open the compass slightly wider than the distance from P to A.
- Place the compass point on A and draw a large arc above the line. Without changing the width, move the point to B and draw another arc that crosses the first one. Label this intersection point Q.
- Use a ruler to draw a line from P to Q.
Your kid will now have a perfect 90° angle! The line PQ is perpendicular to the base line.
Solved Math Tasks
Solved math problem 1: Look at a square. If you add up the measurements of all four corners, what is the total sum in degrees?
Solution: A square has four right angles. Since each right angle is exactly 90°, the solution would be
90 x 4 = 360°
| The total sum is 360° |
Solved math problem 2: Angle A and Angle B sit next to each other and form a perfect right angle. If Angle A is 30°, what is the measure of Angle B?
Solution: Since the total must be 90°, you simply subtract the known angle from the total:
| 90 – 30 = 60° is the measure of Angle B |
Solved math problem 3: In a triangle, one angle measures 90°, and the other two angles are 45° each. What is the specific name for this type of triangle?
Solution:
| Because it contains a 90-degree angle, this triangle is called a right-angled triangle. |
Practice Problems
Are you ready to try out some problems on 90 degree angles for yourself? Our practice problems below are designed to test your new knowledge – simply grab a pen and paper and answer the questions!
- Draw a 90° angle on a piece of paper using only a protractor.
- Identify some objects in your home that have a 90-degree angle and write them down.
- If you have an angle that is twice the size of a right angle, what is the size of this angle in degrees?
Conclusion
Now you have a clear answer to the question of “What is a 90° angle?” and also responses to other queries. Besides, you know that this angle has many interesting properties and can be seen in many mathematical and everyday objects. You’ve just taken a big step in your journey of mastering geometry!
Frequently Asked Questions
What Does A 90 Degree Angle Look Like?
A 90 degree angle looks like a corner, or an L shape. You could also say that it looks like everyday objects like corners of paper, books, or tables.
Is A Right Angle 90 Degrees?
Yes, by definition, a right angle measures exactly 90 degrees. It represents a quarter of a full rotation, which is 360°.
How Many 90 Degree Angles Are Contained In A Straight Angle?
A straight angle measures exactly 180°, which is the equivalent of a flat line. Therefore, it contains exactly two 90° angles. When you bisect a straight line by a perpendicular line, you will get two adjacent right angles.
How Many 90 Degree Angles Are There In A Triangle?
A triangle can have a maximum of one 90-degree angle. Since the interior angles of any triangle must sum to180°, having two right angles would leave 0° for the third corner, which is impossible.
What Measures Exactly 90 Degrees?
Many things measure exactly 90 degrees. Any square corner measures exactly 90 degrees. Common real-world examples include the corners of a picture frame, a book, a screen, or where a wall meets the floor.


Math & reading from 1st to 12th grade
Looking for homework support for your child?

Choose kid's grade
Math & Reading for Grades 1–12
Build real confidence for your child with a Brighterly math or reading tutor.